
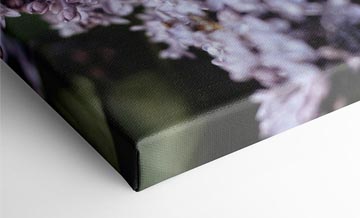
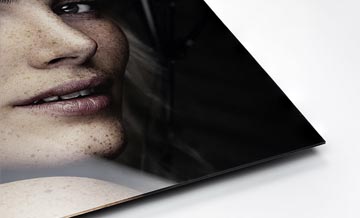
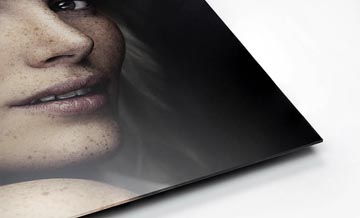
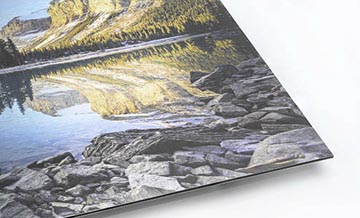
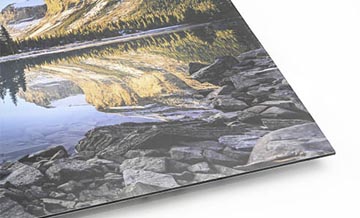
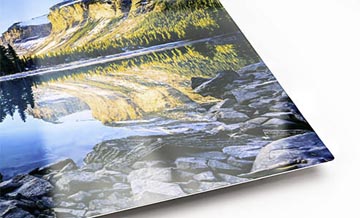










You’ve made the print. It looks great. Now comes the question: what do you do with it? A loose paper print is great if it’s heading straight into a frame, but it’s not always the easiest thing to handle—especially when you start printing big. Paper bends, curls and generally likes to remind you that, well, it’s paper.
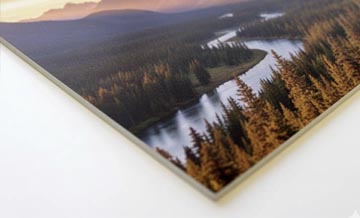
That’s why Pictorem offers the option to dry mount paper prints onto foamcore. It’s a simple upgrade that gives your print a rigid backing while keeping it lightweight and easy to handle. You still get the look and finish of the paper you selected, but the finished print feels more substantial and is much easier to display.
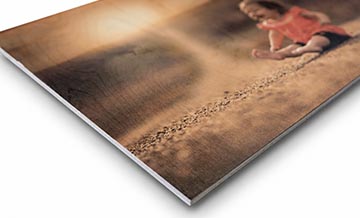
Dry mounting is pretty much what it sounds like: your finished paper print is permanently mounted onto a rigid backing. At Pictorem, that backing is foamcore. Instead of receiving a flexible sheet of photographic or fine art paper, you receive a flat, supported print that you can pick up, move around and display much more easily.
The important part is that it’s still a paper print. You’re not changing the image into a metal, acrylic or other type of print. The foamcore simply gives the paper some backbone. Literally.

The biggest reason is convenience. Smaller paper prints are relatively easy to handle. Start getting into larger sizes, though, and things become a little more interesting. A big sheet of paper can curl, bend and become awkward to move around without damaging it. Mounting it to foamcore solves a lot of those headaches.
It also gives the print a cleaner, more finished appearance. You can put it on an easel, lean it against a wall, place it on a shelf or use it in a display without having to frame it immediately. For photographers who regularly show work to clients, bring prints to exhibitions or simply like swapping artwork around, that can be surprisingly useful.
There isn’t one "correct" way to use a dry-mounted print, which is part of the appeal. Photographers can use them for portfolio presentations or client meetings, where handing someone a rigid print feels a lot better than wrestling with a large loose sheet.
They’re also handy for exhibitions, trade shows, pop-ups and temporary installations. Foamcore is lightweight, so moving several large prints around is much easier than dealing with heavier display materials. At home, you can keep things casual. Put one on an easel. Lean it on a shelf. Create a rotating collection of prints. Or frame it later when you find the right frame.
Dry mounting is also worth considering when you're printing large photographs. The bigger the paper gets, the more useful that extra support becomes.
There are quite a few reasons to consider dry mounting: It keeps your paper print flat. It makes larger prints much easier to handle. Foamcore is rigid but lightweight. You keep the look and feel of a traditional paper print. It can be displayed without immediately adding a frame. It works well for presentations, exhibitions and temporary displays. It can still be framed later.
And perhaps most importantly, it's simple. You don't need to completely rethink how you want your photograph printed just because you want something more substantial than a loose sheet of paper.

There are a few things to keep in mind. First, dry mounting is permanent. Once the print is mounted to the foamcore, it's meant to stay there. If you're buying or producing work that requires a very specific archival or conservation approach, you'll want to consider whether permanent mounting is appropriate.
Foamcore is also lightweight by design. That's great for transporting and displaying prints, but it doesn't have the same rigidity or durability as something like aluminum. And while the backing helps protect the print from bending and curling, the surface is still paper. You'll still want to handle it carefully.
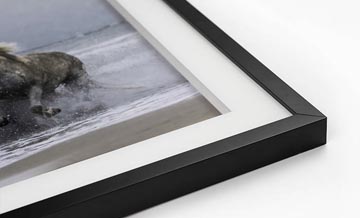
Finally, some people simply prefer the look of a traditional framed and matted print. Dry mounting isn't meant to replace that. It's another option.
You don't necessarily have to choose. Dry mounting gives the print support. Framing gives it a finished presentation.
If you already know exactly how you want to frame your photograph, you may decide that mounting isn't necessary. But if you want to display the print first, move it around, use it for presentations or decide on framing later, dry mounting gives you that flexibility. It's also a nice option for anyone who likes a more casual, contemporary way of displaying photography. Not every print needs a giant frame and a museum wall.

Acrylic and metal prints are completely different animals. With those products, the printing medium itself becomes a big part of the final look. Acrylic can add depth and gloss, while metal gives photography a distinctly modern presentation.
Dry mounting is for someone who says, "I like the paper. I just don't want it flopping around." You still get the characteristics of the paper you chose. The foamcore is simply there to support it.
That makes dry mounting especially interesting for photographers who love the traditional appearance of photographic and fine art papers but want something easier to handle and display.
The larger you print, the more useful dry mounting becomes. A large loose paper print can be beautiful right up until you have to move it across the room. Suddenly you're holding it with both hands, trying not to bend a corner while wondering why you didn't ask someone to help.
Foamcore makes that process considerably easier. The print stays flat and supported while remaining light enough to move around without turning it into a two-person job. For exhibitions, client presentations or simply making a big print for your own space, that's a pretty nice combination.
Dry mounting isn't about reinventing the paper print. That's actually the point. You get the photograph, paper and finish you wanted in the first place—just mounted onto a lightweight foamcore backing that makes the whole thing easier to handle, display and enjoy.
No curling. No floppy corners. No immediate commitment to a frame. Sometimes your paper print just needs a little backup.
START ORDER
| Team up with Pictorem to take advantage of an existing sales tool without needing to develop one yourself. We handle the e-commerce transactions, production & the logistics of fulfilling each order so you can focus on your art and your promotion. Click on the video link below for more information |
| Watch the video on youtubeSubscribe to our channel |
If you’re an artist, graphic designer, or photographer looking to sell your art reproductions, the process is super simple: all you have to do is create an account, upload your art, & set your price. Then, just promote your gallery & Pictorem takes care of rest. |
| FREE REGISTRATION |
Why choose us We offer a variety of printing mediums such as acrylics, metals, murals, posters, photo paper, canvas & wood to be able to meet all your printing needs. Our team also reviews every order by hand and makes sure to give you the best print quality. - Free, no monthly cost, no trial period. - We don't ask for any exclusivity - You can cancel anytime - We don't take any commission on your rights |
| CREATE YOUR ONLINE GALLERY TODAY |
| FREE REGISTRATION |
| For existing user, please login to your account and click on "Create your online gallery" |
This article is to help you understand how to transform your image into a mural print.
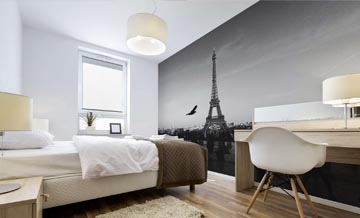
Yes, we're talking about huge prints that will cover your entire wall for an immersive experience !
We are going to talk to you about all the options you'll have, the requirements and installation, of course process.
There's no actual limit to the size that you can have your print
Since your peel and stick wall mural will be arriving in sections, you can get any amount of strips that you need to make for a very easy installation
To get things started, if you want a sharp image, you will preferably need a high resolution image.
Nowadays, most digital cameras can provide 5000 to 8000 pixels in a single shot
One good trick is called image stitching which is a process of combining multiple shots with overlapping fields to produce one massive panoramic image!
Of course, this is all based on how sharp you actually need your image and how close you're going to be from your print
Images for mural prints are processed at 150 dpi which means we'll most likely upscale your image
Let's say, for a 10ft wall, you'll need at least 8000 pixels wide to get some sharp details
With new 40 megapixel+ cameras, this is easily achievable
If you need help figuring out if your image is large enough for a mural print,
look into our DPI calculator and our image size analyzer on our website.
https://www.pictorem.com/dpicalculator.html
https://www.pictorem.com/checkprintsize.html
All this being said, keep in mind that, in most cases, you'll be looking at your mural from at least 3 or 4 feet away from your wall so don't be too worried if your resolution is not quite on the mark
We take pride in offering the best possible results for your image.
To make that happen, we don't make any compromises in our hardware, our material and, most importantly, our customer service.
Every single order is important to us and we take the time to review every single image that comes in
So if we notice any needed fine tuning or optimization, you can have peace of mind that we'll always keep you in the loop
We use state-of-the-art 10-color printers which provides the best printing resolution and color range for mural prints and we are very proud to offer the most vibrant color reproduction in the industry.
As for the material, we use a sturdy, repositionable peel-and-stick vinyl
It has a subtle, matte, linen texture to it which helps absorb light and cover any imperfections on your wall, it's extremely easy to install and it's very forgiving
Installation
If you have a long wall, we suggest that you start from the center which will ensure the straightest installation
Peel and stick wall mural can be installed on a wide variety of smooth surfaces such
as gypsum boards, wood, glass, metal and some plastic panels.
The surface has to be clean, smooth, dry, and free of moisture
Peel down about 6" from the top of your Panel.
To minimize any deformation, apply the wall mural with minimal tension
and remove the protective paper about a foot and make sure not to remove too much at one time
Smooth out the wall mural by using the plastic scraper (which we will be provided with your order) starting from the center and working your way towards the edges of the panel
As I mentioned earlier, the peel and stick wall mural is very forgiving
So if you made a mistake, went a bit crooked or see an air bubble you can peel the mural back at reapply it with ease
And don't forget to apply a good pressure to insure adherence, especially towards the edges of each panel
Mural prints arrive in 50" inch sections, and each section has a half an inch with a guideline to help you with your installation
Once all the panels are installed you can cut off the excess with a utility knife.
With our imaging processing service, our state of the art printing equipment and easy to install wall vinyl, we are convinced we will be able to provide the best impact for your project.
This article is all about acrylics prints.
If you want to bring a contemporary look, to your home, your office or any other space you want to "dress up", this is the choice for
We print on the back of an optically pure acrylic sheet using the latest flatbed printer and we print right up to the edges of the acrylic, to provide a very neat finish.
Size
First up - Size. We can print any custom size you want - ranging from a small 8x8 all the way up to a majestic 96x48. So if you want a large panoramic picture, or to even create a multi panel print, the only limit is your imagination.
Mounting options
We also offer different mounting options.
The most popular configuration is a back mount frame. We have a black layer at the back of the acrylic print and this option will give your print a frame with a wire, so it's ready for easy hanging. It will also give the impression that your acrylic is floating slightly away from the wall.
You can also display your acrylic print with Aluminum Stand offs. It will be at the same distance from the wall, about 3/4 of an inch. They are installed on each corner, so be sure to double check that we don't cut off any signature or crucial visual elements on your image. If you have a large acrylic, we suggest that you install more than 4 stand offs for a maximum distance between each stand off of about 40 inches. This will prevent your acrylic from bending.
Thickness
We offer 2 different thicknesses. You have the choice between 1/8" inch and 3/16".
The 1/8 is already a great choice. It's very light and will remain flat if you are using a back mount frame.
The 3/16 thickness is a good option if you want to provide a greater optical depth, or when you have a large print to prevent the acrylic from bending between the stand offs, but it does add more weight.
Transparency
You can really explore your creativity with transparency. We can print on specific areas only, and you can even go with a multi layer effect. If you want to print your logo, or any other background-free visual, it's simple. Just provide us with a PNG or Photoshop file with a transparent area.
You can create very interesting lighting effects with partial transparency like this "frost" effect. We will partially print the white layer so only the colors are fully printed.This looks absolutely stunning in natural light.
And if you want to use the acrylic on a lightbox with LEDs on the back, we can make a (backlit) print . All these printing options are available on our website.
Shape
We can also cut the acrylic any way you want. For example we can create rounded corners.
... or even a circular print. Again, these options are all available on our website.
https://www.pictorem.com/acrylic-print.html
Let's talk about the different
The choice of your finish will have a big impact
This canvas has a weight of 410 grams per meter. It’s a pure white, polyester cotton blend. It’s
The matte finish of this canvas provides a fine art look that works extremely well for photography, abstract paintings and everything else in between. It is a great all around canvas!
The matte varnish canvas is also called “satin canvas” because of the subtle shine that runs through it.
The matte varnish finish adds an extra layer of protection to resist scratches and fingerprints so if your reproducing an image that has lots of black in it, this product is and ideal choice and one that you might want to consider!
On top of adding an extra layer of protection, colors will come out more vibrant so you can expect richer blacks and very vivid colors with this finish! Depending on the lighting, you can really see the texture of the canvas which can give an awesome complimentary effect to your artwork. Great choice if you want your colors to pop with an extra glossy look!
Semi-gloss canvas adds an extra layer of protection and the colors will appear more vibrant, so you can expect richer blacks and very vivid colors with this finish!
Depending on the lighting, you can really see the texture of the canvas which can give an awesome complimentary effect to your artwork. It is an exceptional choice if you want your colors to pop with an extra glossy look!
Silver canvas comes with a silver color base coat embedded into it. This means that all the white that you would normally see on a regular canvas will become silver, and all the other colors will come out looking metallic. We’ve seen some amazing photography and illustrations printed on this material that are simply mind-blowing!
We call this canvas option the knife varnish process. With this technique, we can mimic or create paint strokes to give a more authentic look to a painting or simply add an extra textured look to a photograph.
This process is the "showstopper". The epoxy coating will give your print a very luxurious, ultra high gloss finish.
This is the showstopper! The epoxy coating will give your print a very luxurious, ultra high-gloss finish.
This finish adds extra weight to the canvas so to make sure that the canvas doesn't buckle when adding the resin coat, we attach a masonite board behind the canvas. A canvas print with an epoxy coating requires more time and effort to produce, however, the results are totally worth it!